Posted by João Martins on 13 Apr 2026
How to Submit a Gatsby Form to Google Sheets
Add form submissions to your Gatsby site without plugins or serverless functions
Gatsby builds fast React-powered static sites. With Form2Sheet, you can add form submissions without installing plugins or setting up serverless functions. Just create a React component that posts to our API.
In this tutorial, I will guide you through the process of submitting a Gatsby form to Google Sheets using Form2Sheet, making your data collection journey smooth and efficient.
Step 1: Prerequisites
The first step in integrating Form2Sheet is to subscribe either monthly or yearly.
Then, go to https://form2sheet.com and create your first
spreadsheet.
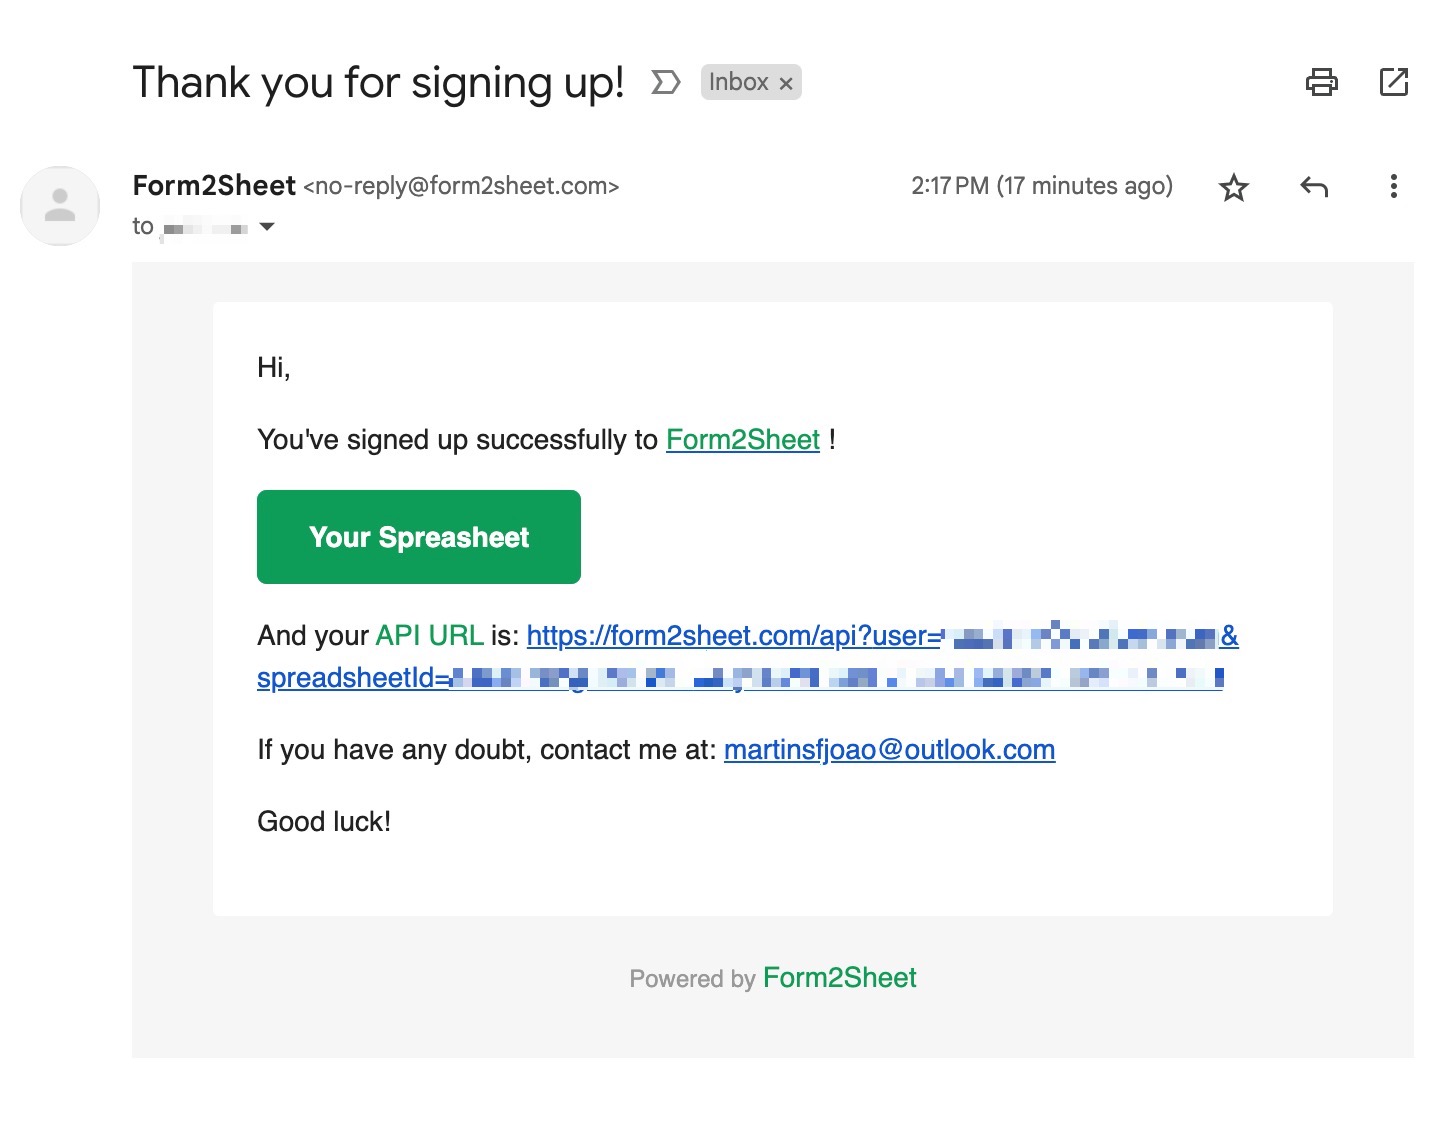
(Email received after creating a spreadsheet)
Step 2: Building Your Gatsby Form Component
Create a React component for your contact form. This component uses useState to manage form data and fetch to submit it to Form2Sheet. Make sure to replace the $API_URL with the one you received
in your email (check your spam folder as well).
// src/components/ContactForm.js
import React, { useState } from 'react';
const ContactForm = () => {
const [formData, setFormData] = useState({
name: '', email: '', message: ''
});
const handleChange = (e) => {
setFormData({ ...formData, [e.target.name]: e.target.value });
};
const handleSubmit = async (e) => {
e.preventDefault();
const form = new FormData();
Object.entries(formData).forEach(([key, val]) => form.append(key, val));
await fetch('', { method: 'POST', body: form });
alert('Form submitted successfully!');
};
return (
<form onSubmit={handleSubmit}>
<label>Name:</label>
<input type="text" name="" value={formData.name} onChange={handleChange} />
<label>E-mail:</label>
<input type="email" name="" value={formData.email} onChange={handleChange} />
<label>Message:</label>
<textarea name="" value={formData.message} onChange={handleChange}></textarea>
<button type="submit">Submit</button>
</form>
);
};
export default ContactForm;
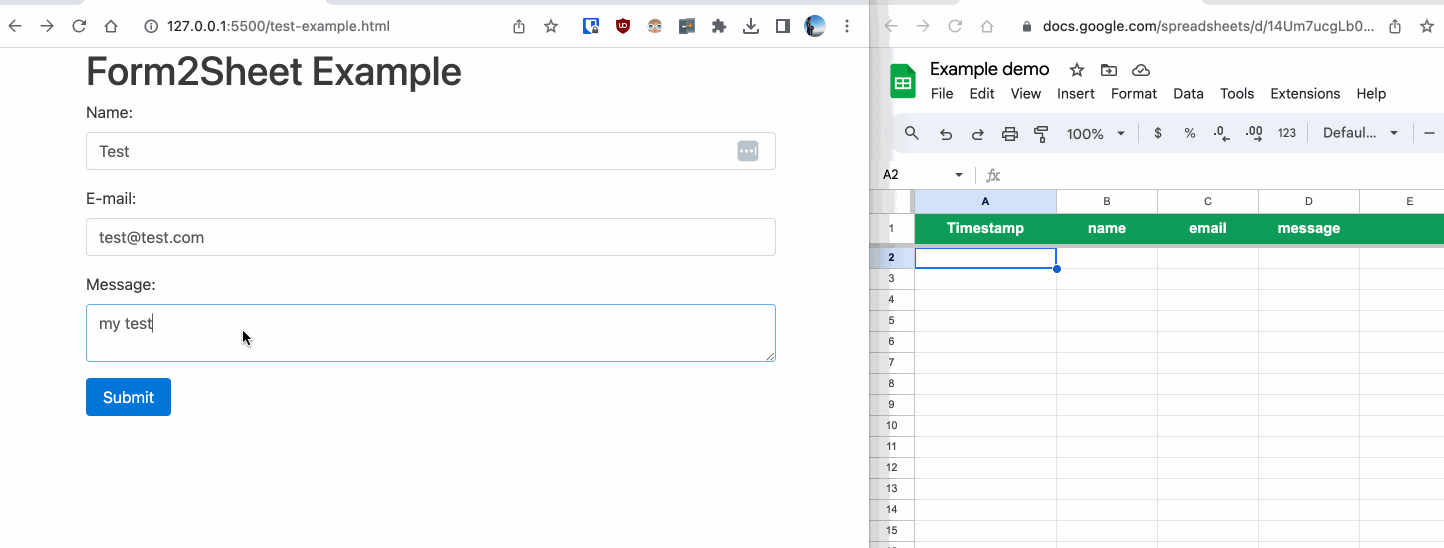
Step 3: Submitting the Form
In the GIF below, you can see how after submitting the form you check the results in
your Spreadsheet.
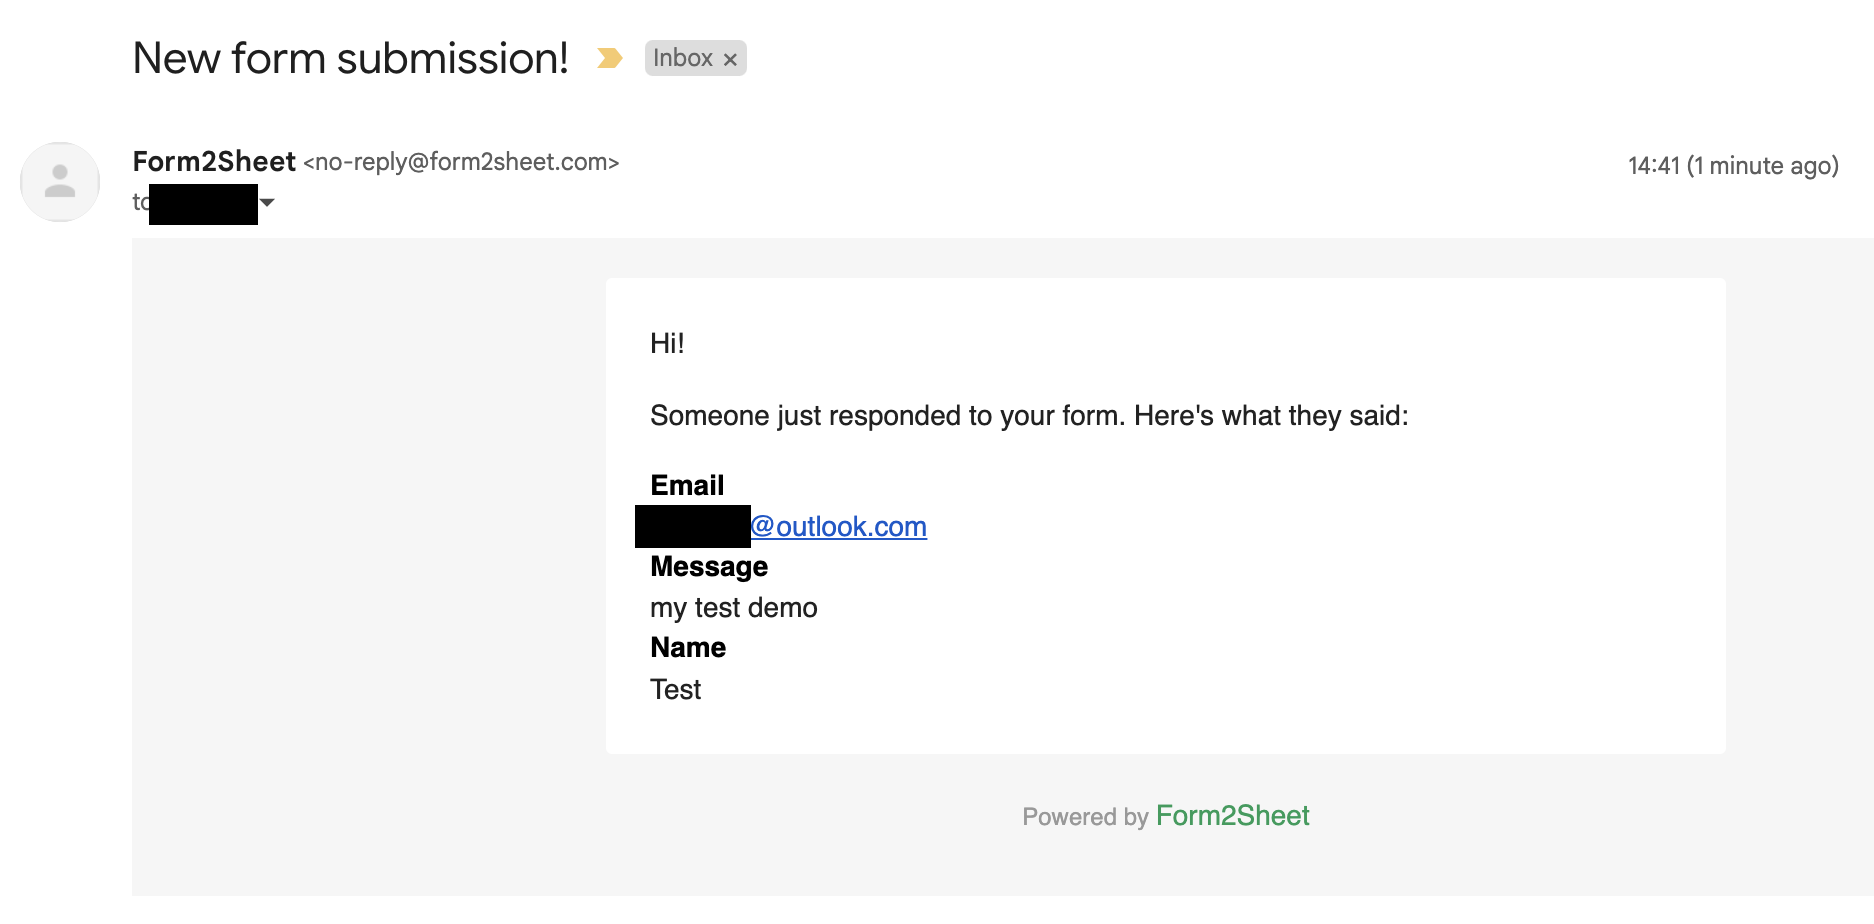
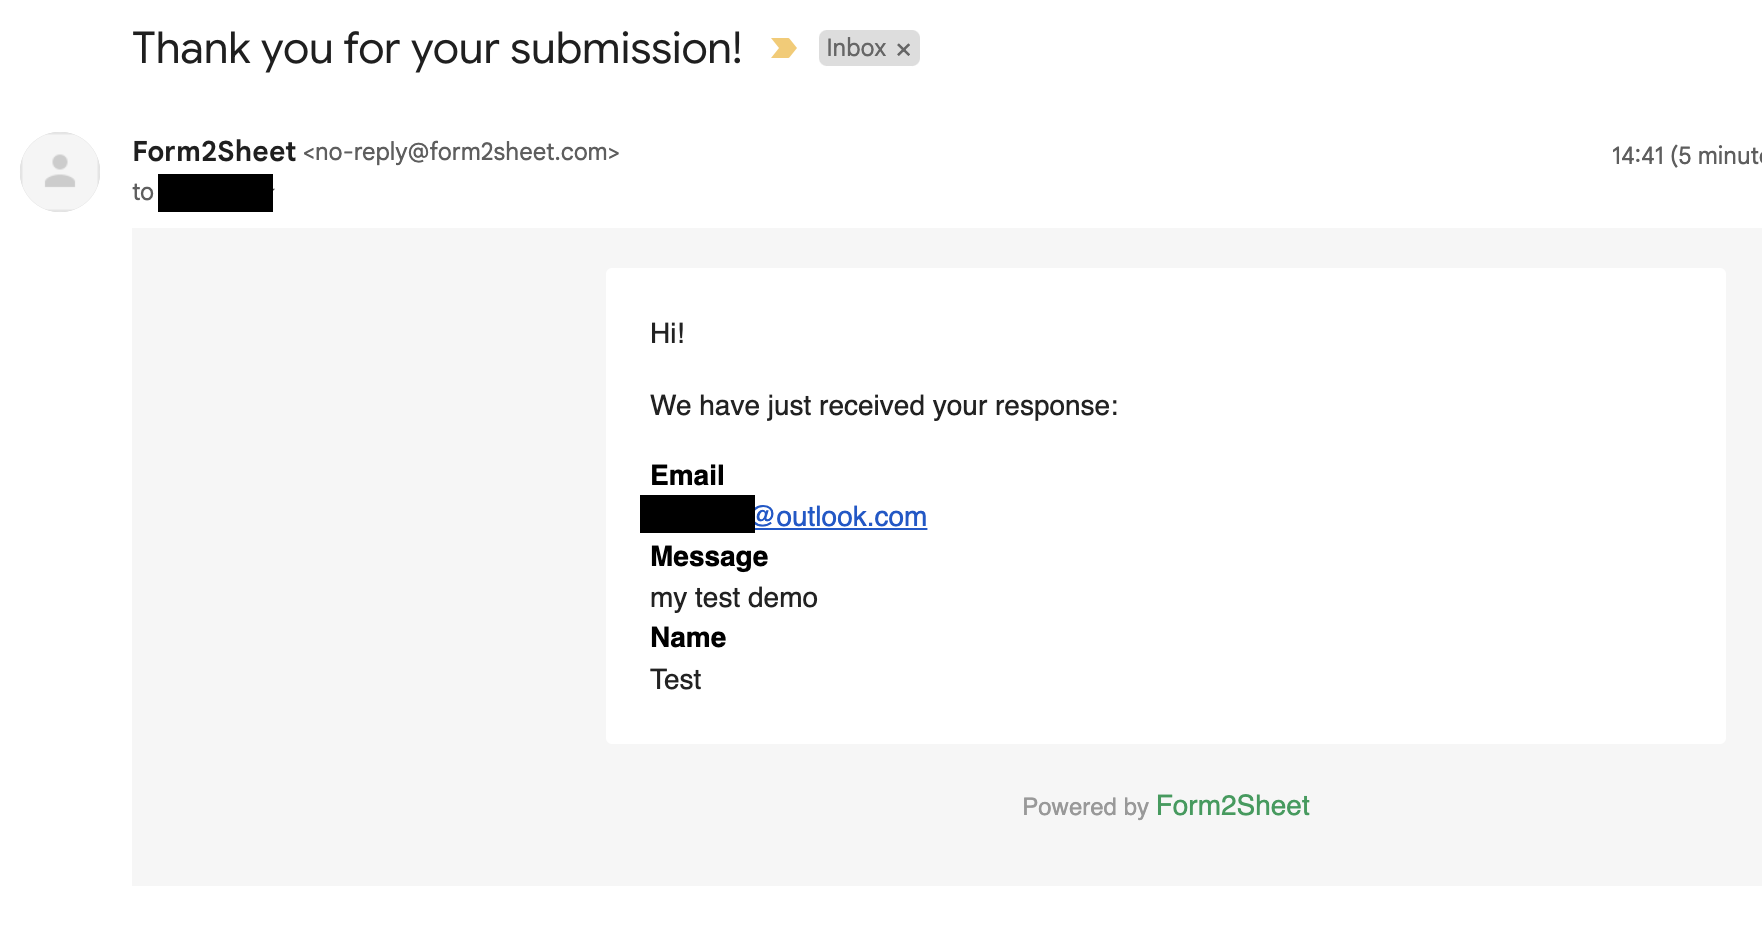
Besides that, you and the respondent will receive a confirmation email with the data
submitted.
And that's is! Simple as that. Aditionally, you can create Unlimited Spreadsheets, customize the Thank You page, add as many Custom Form Fields as you want and remove the Form2Sheet branding from the emails.

Conclusion
Congratulations! You can now go ahead and publish your Gatsby contact form. It is now
ready to start collecting responses. With
Form2Sheet, the process is streamlined, and you can focus on obtaining valuable data
without
the hassle of complicated setups.
If this made you curious, go ahead and check our pricing below.
Related Guides
Explore our other tutorials for different platforms and frameworks:
